
Stash
A small personal finance tracker built with Next.js, Supabase and Tailwind CSS. Stash lets you record expenses, view recent transactions, and analyze spending with charts.
Tech stack: Next.js 16 · React 19 · Tailwind CSS 4 · Supabase · Recharts · Zustand
Demo
https://stash-lemon.vercel.app/
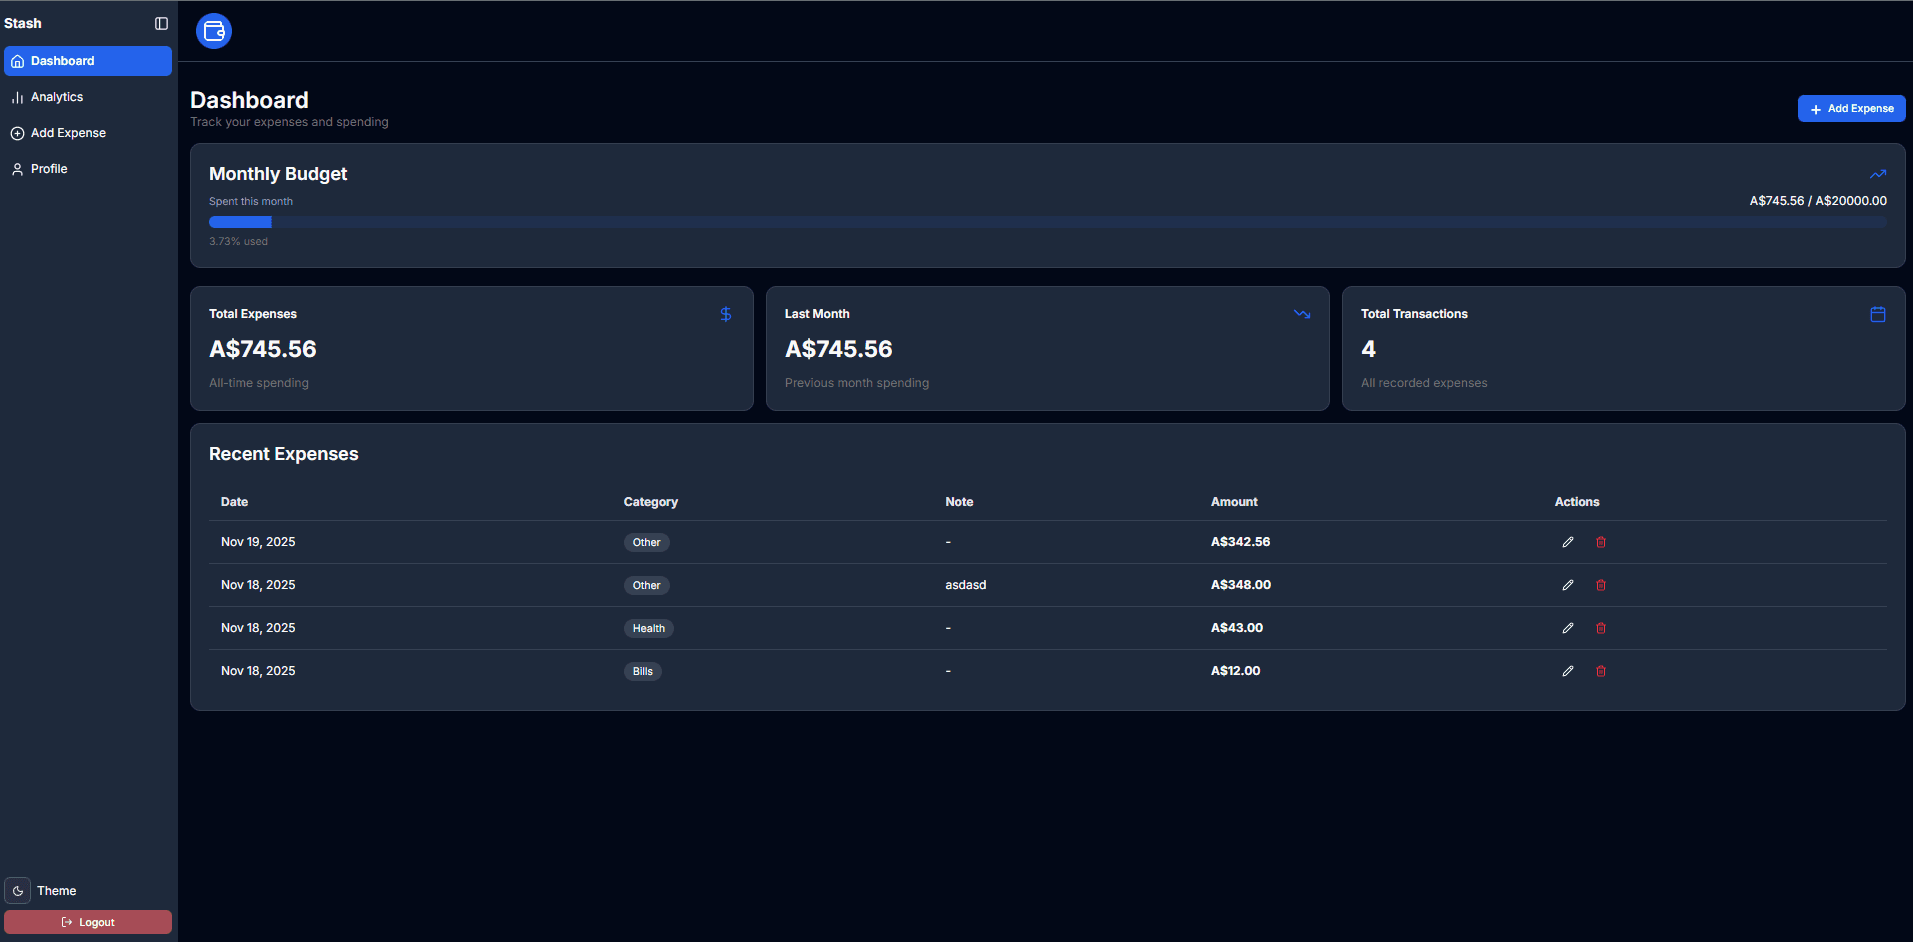
What this project does
Stash is a simple expense tracker web application that helps you:
- Add and manage expenses (category, amount, note, date)
- View recent expenses in a responsive table
- Analyze spending with charts (pie chart by category, other visualizations)
- Persist data using Supabase (Postgres + auth)
Project layout (key folders):
app/– Next.js App Router pages and layoutscomponents/– UI components (cards, forms, charts, nav, theme toggle)components/charts– Recharts-based chart components (Pie, Line)lib/– utilities, categories, currencies and supabase helpersstore/– lightweight client state (Zustand)
Why it’s useful
- Lightweight, opinionated starter for building personal finance or expense tracking apps
- Ready-made UI components and charts so you can focus on features
- Uses Supabase for quick backend (no server code required for many features)
- Easy to extend: add budgets, recurring payments, reports
Quick Start
Prerequisites
- Node.js 18+ (tested on Node 18/20)
- npm or pnpm
- A Supabase project (for database and optional authentication)
Steps
- Clone the repo
git clone <your-repo-url> stash
cd stash
- Install dependencies
npm install
# or
# pnpm install
- Configure environment variables
Create a .env.local file in the project root with the following (replace with your Supabase values):
# Supabase (client)
NEXT_PUBLIC_SUPABASE_URL=https://xyzcompany.supabase.co
NEXT_PUBLIC_SUPABASE_ANON_KEY=public-anon-key
Notes:
lib/supabase/client.tsusescreateBrowserClientand reads theseNEXT_PUBLIC_*values.- For server-side Supabase usage (if added), you may also need
SUPABASE_SERVICE_ROLE_KEYor similar server keys, but this starter only requires the public client keys for the browser.
- Run the development server
npm run dev
# Open http://localhost:3000
- Build for production
npm run build
npm run start
Pages & Usage
/– landing / dashboard/add-expense– add an expense/analytics– charts and spending breakdown/profile– user profile (backed by Supabase profile helpers)app/(auth)/loginandapp/(auth)/signin– auth flows
Components you’ll likely edit or reuse:
components/AddExpenseForm.tsx– the expense entry formcomponents/charts/*– Recharts chart components (PieChart, LineChart)components/theme-provider.tsxandcomponents/DarkModeToggle.tsx– theme handling
Examples
- Adding an expense stores it in Supabase via helpers in
lib/supabase/expenses.tsand updates the local Zustand store instore/expenseStore.ts. - Charts are built with
rechartsinsidecomponents/ui/chart.tsxwrapper; to tweak animation or responsiveness, edit the chart components incomponents/charts/.
Environment & Deployment Notes
- This app is built for static+serverless environments (Vercel, Netlify). When deploying, set the same environment variables (
NEXT_PUBLIC_SUPABASE_URL,NEXT_PUBLIC_SUPABASE_ANON_KEY) in your host. - For true server-side Supabase usage add server-only service role keys as secure environment variables.
Troubleshooting / Common Gotchas
- If charts or animations stutter, try setting an explicit height on the chart container (see
components/charts/PieChart.tsx) or adjust RechartsanimationDuration. - If theme or color variables change instantly (no transition), ensure Tailwind CSS and global styles (
app/globals.css) include transitions forbackground-color,color, andborder-color. - If Supabase calls fail in the browser, confirm
NEXT_PUBLIC_SUPABASE_URLandNEXT_PUBLIC_SUPABASE_ANON_KEYare correct and not empty.
Where to get help
- Open an issue in this repository
- Submit a PR for bug fixes or features
- If this project is used as a starter in your organization, keep an internal README with deployment steps and secrets management
Maintenance & Contributing
Maintainer: zidvsd (repository owner)
If you want to contribute:
- Fork the repo
- Create a descriptive branch (
feat/,fix/,docs/) - Add tests where applicable and keep changes focused
- Open a pull request with a clear description
If you plan to contribute regularly, consider adding a CONTRIBUTING.md file with repository-specific guidelines. This README intentionally keeps contribution steps brief — see CONTRIBUTING.md if present.
License
See LICENSE in the repository root for license details (if present).
Acknowledgements
- Built with Next.js, Supabase and Tailwind CSS
- UI patterns inspired by community components and shadcn/ui
If you'd like, I can also:
- Add a short
CONTRIBUTING.mdtemplate andISSUE_TEMPLATE.md/PULL_REQUEST_TEMPLATE.mdto the repo - Add a
docs/folder with architecture notes and a small diagram
Happy hacking — open an issue or PR if you want any of the follow-ups above!